Mounting the Product to a Wall
Checking before mounting to a wall
You can mount this product onto a wall.
When affixing the product to the wall, follow the instructions below.
Please check the following first.
- • It may be difficult to connect external devices and cables after wall-mounting. First, connect an external device with the proper connection cable to the product before mounting it to the wall.
- • Please note the following when you mount the product to the wall. Product damage or injury may occur during the process.
- - Do not put objects on top of the wall-mounted product.
- - Secure the product firmly to the wall using the fixing screws so that it does not fall off.
- - Ensure it is out of the reach of children. Pulling or shaking the mounted product may cause it to fall.
- • There are also speakers on the top of the product. When installing the product under the TV, install it 10 cm (3.9 inch) away from the bottom of the TV.
- • When assembling, ensure that all of the provided screws are attached. If the screws are not fully tightened, the product may tilt or tip over, resulting in damage. Tightening the screws with excessive force may cause them to come off due to abrasion of the screw joint.
- • Set the screw to the appropriate strength so that it does not wear out when using an electric driver.
- • To install the bracket, make sure that the wall is made of a material that can sufficiently withstand the weight and vibration of the soundbar, such as concrete, natural stone, structural bricks or wood stud.
Components for mounting the product
|
Soundbar |
|
|
Wall bracket |
|
|
Soundbar screws |
|
|
Wall bracket installation guide |
|


Sold separately
|
Bracket screws |
|
|
Wall plugs |
|


|
|
|
|
|
Screws and Wall Plugs are not supplied for mounting the product. We recommend the M4 x 35 mm bracket screws and the Hilti (HUD-1 6 x 30) wall plugs for the mounting. |


Mounting the Product to a Wall
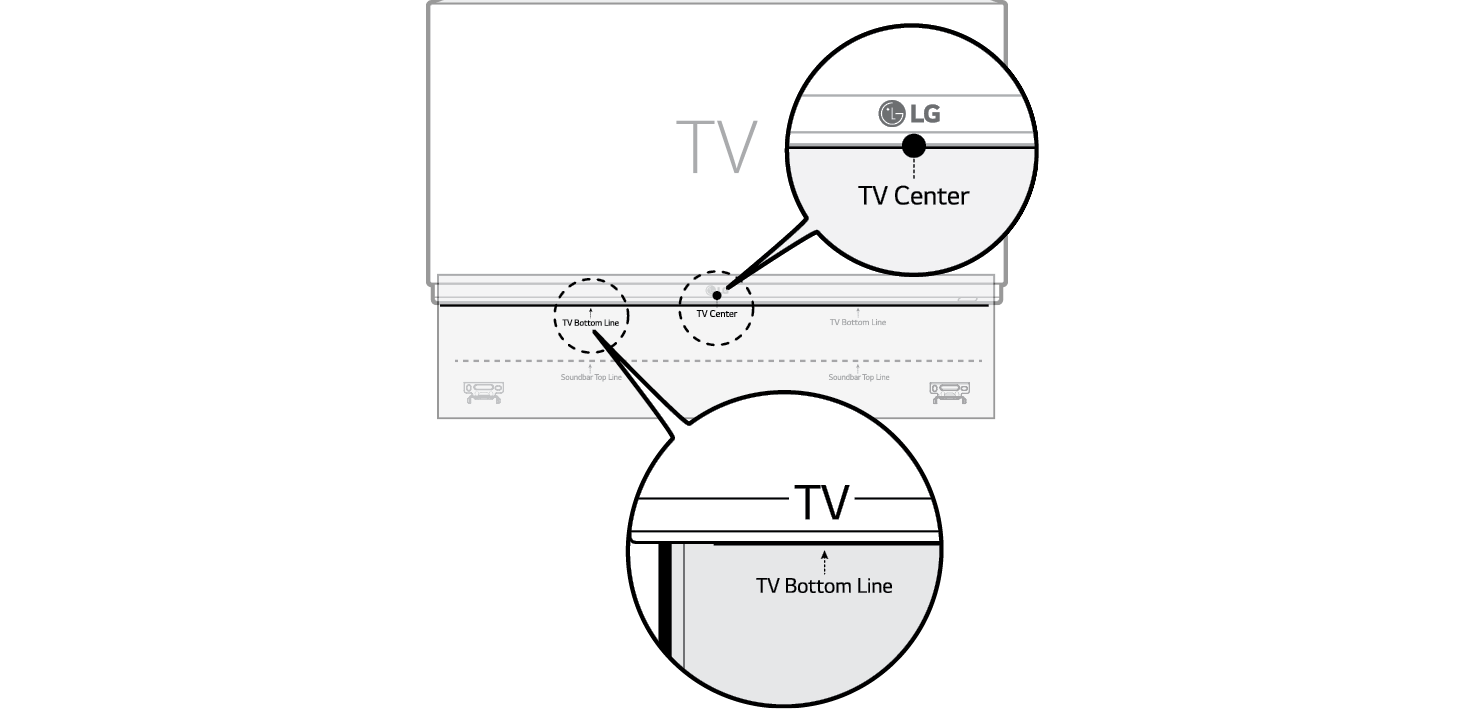
- a Find the wall bracket installation guide in the product package.
- b Align the “TV Bottom Line” on the wall bracket installation guide with the bottom of the TV, and attach it to the wall. Align the center of the wall-mounted TV with the part marked “TV Center” in the installation guide.

- c With a pen, mark screw holes on the installation guide where the wall brackets will be attached.
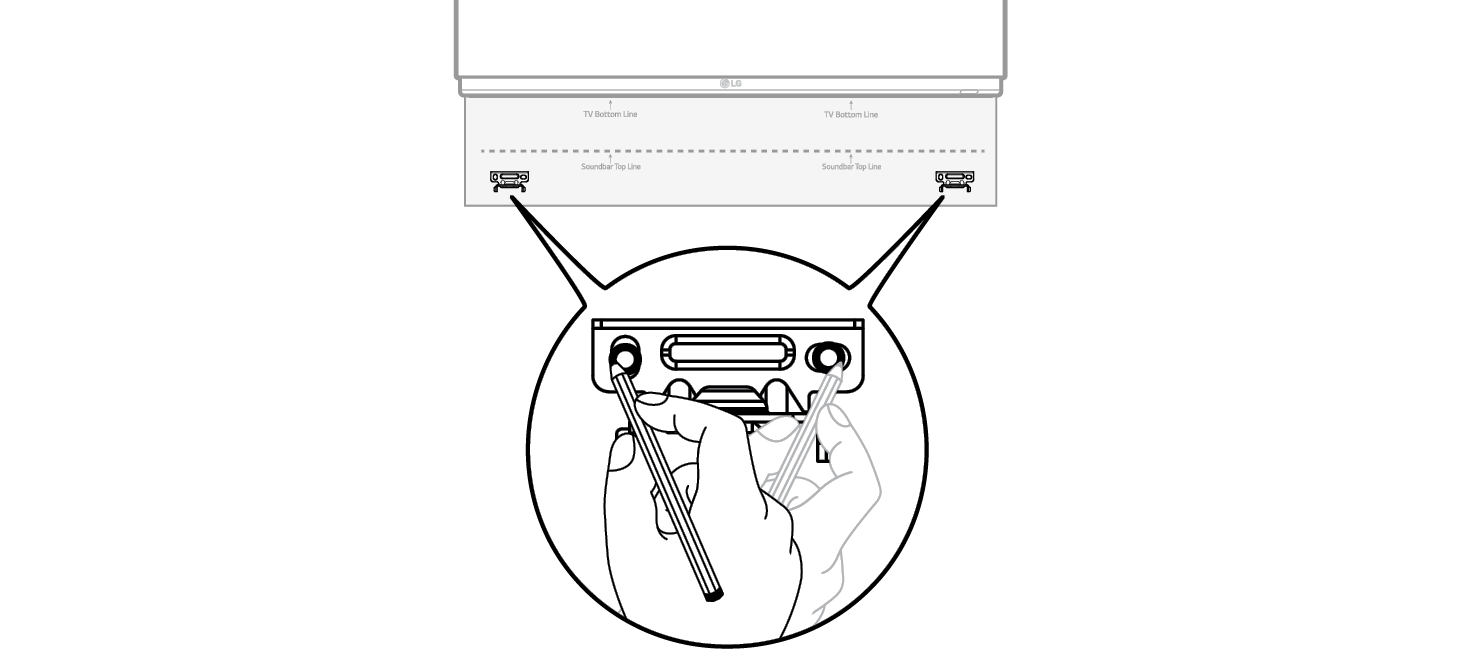

- d Drill screw holes in the marked positions on the installation guide.
- e Remove the wall bracket installation guide from the wall.
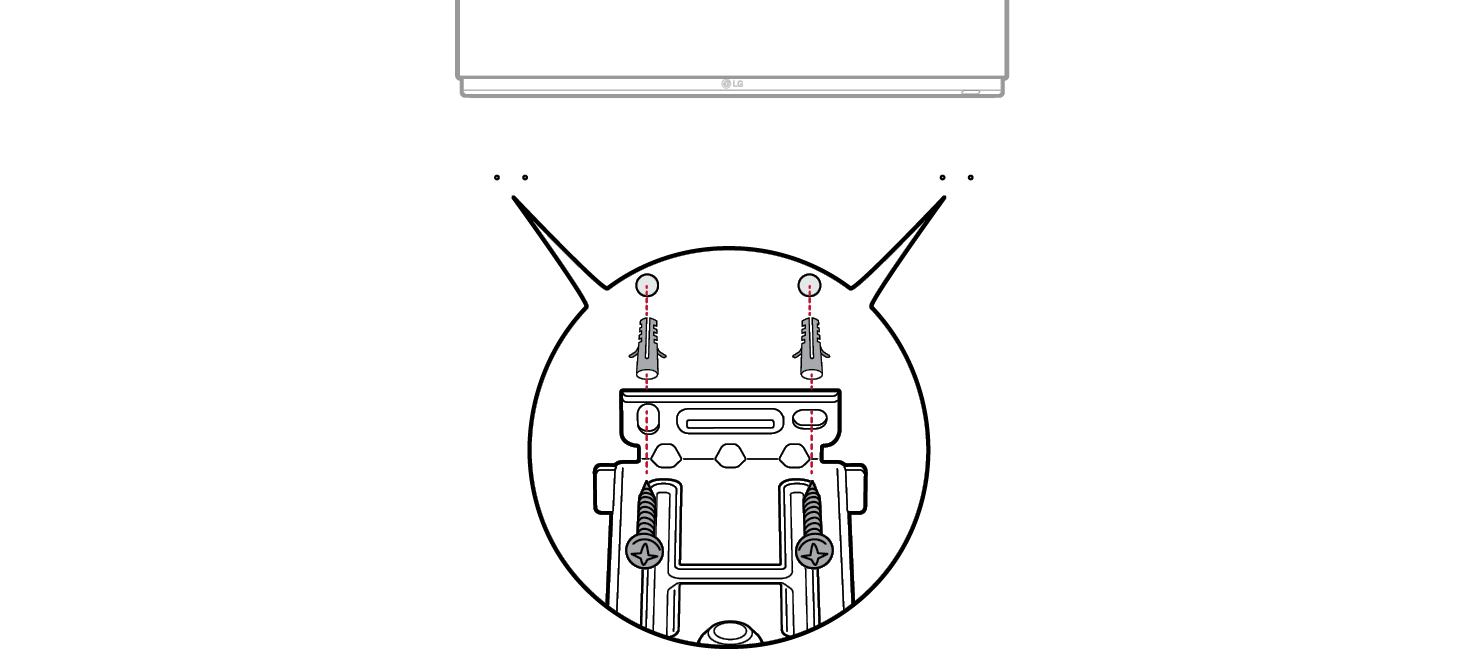
- f Fix the brackets firmly to the wall using the wall plugs and screws.

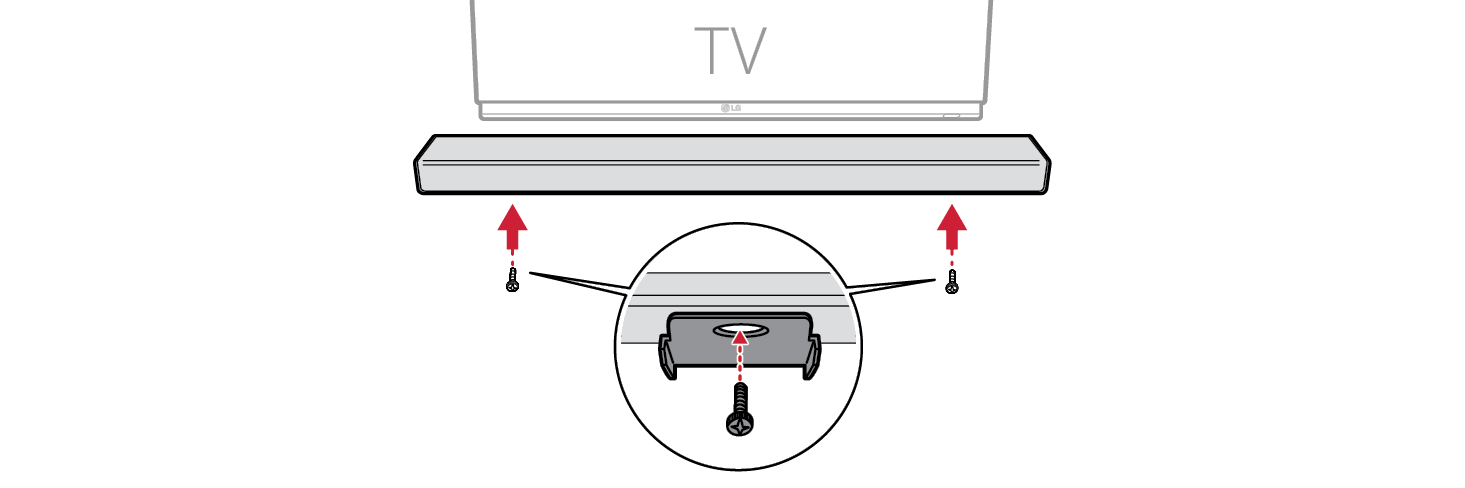
- g Place the product on the brackets. Position the product on the brackets so the screw holes on the bottom of the product align with the screw holes on the wall bracket.
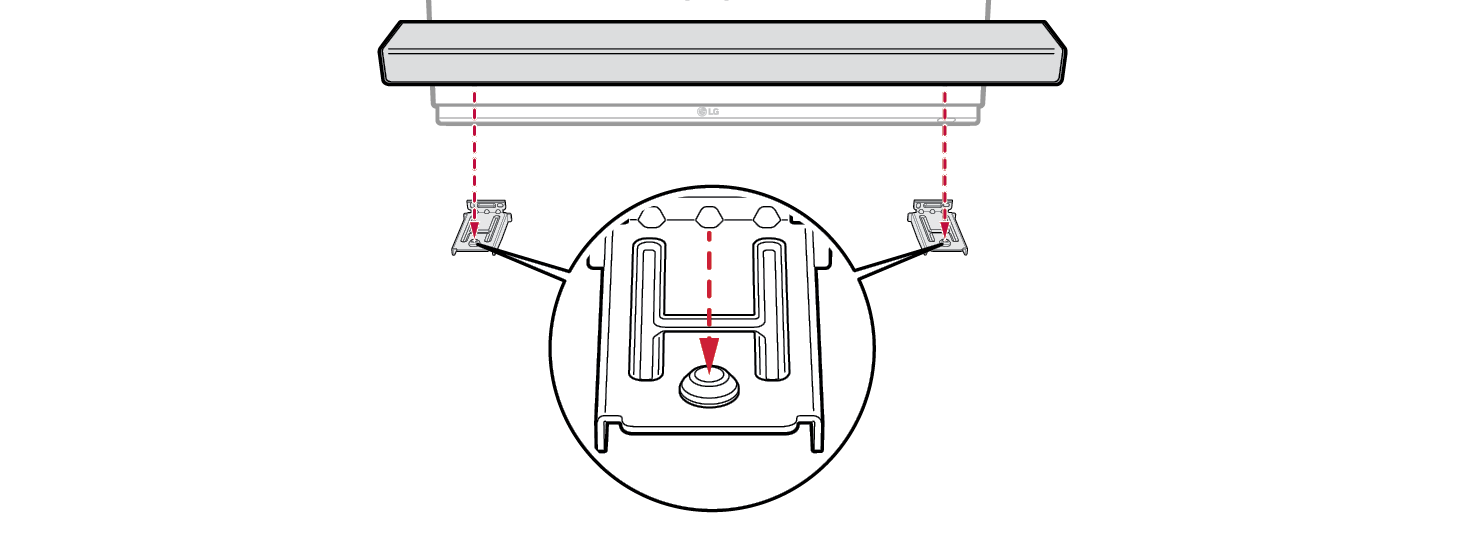

- h Firmly attach the product to the wall brackets using the screws provided.